The cannabis flowering stage is the most exciting time in your growing journey because this is when your plants start producing the buds you have been waiting for. After weeks of vegetative growth, your plant finally shifts its energy from growing leaves and stems to developing dense, aromatic flowers. Understanding this phase will help you get the most out of your harvest.
During the cannabis flowering stage, your plants go through many changes. The buds start small and gradually grow bigger over several weeks. Knowing what to expect and how to care for your plants at each point makes a big difference in the final product.
Understanding the Cannabis Flowering Stage
The cannabis flowering stage begins when your plant receives a signal to start producing flowers instead of focusing on vegetative growth. For photoperiod strains, this signal comes from changes in light exposure. Indoor growers trigger this phase by switching to a 12 hours on, 12 hours off light cycle. Outdoor plants naturally enter this phase as days get shorter after the summer solstice.
Autoflowering varieties work differently. They enter the flowering phase based on age rather than light changes, typically around the five-week mark from seed. This makes them a good choice for beginners or those growing in areas with less predictable sunlight.
The cannabis flowering stage typically lasts between 7 to 12 weeks, depending on the strain. Indica-dominant varieties usually finish faster, while sativa-dominant strains may need more time. Paying attention to your specific strain’s needs helps you plan for the best harvest timing.
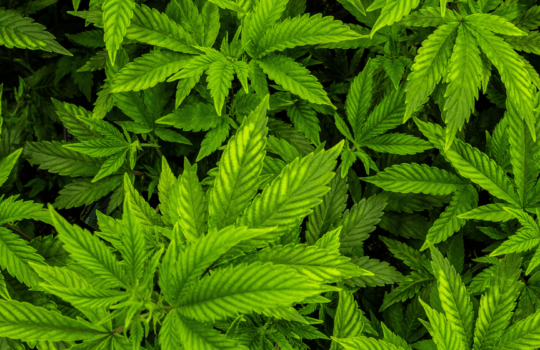
During this time, your plant undergoes significant hormonal changes. Auxins and gibberellins increase, promoting stem elongation and the development of flower sites. Female plants produce pistils, the white hair-like structures that eventually become part of the mature bud. Male plants produce pollen sacs, which you want to identify and remove early to prevent pollination.
Week by Week Timeline During the Cannabis Flowering Stage
Weeks 1 to 3 of the Cannabis Flowering Stage
The first three weeks are often called the transition or stretch phase. Your plants may double in height during this time as they prepare to support heavy buds. You will notice rapid vertical growth and the appearance of small white hairs called pistils at the nodes.
During these early weeks of the cannabis flowering stage, your plants still need some nitrogen alongside phosphorus and potassium. Many growers continue with vegetative nutrients for the first week before slowly transitioning to bloom nutrients. This gradual change prevents shock to the plant.
Low stress training techniques can still be applied during the first two weeks to create an even canopy. Bending stems and tying them down allows more bud sites to receive light. Avoid heavy pruning after week three to prevent stress that could affect bud development.
The stretch phase is also when you should make final adjustments to your grow space. Ensure your lights are positioned correctly to accommodate the additional height. If plants grow too close to the light source, you risk light burn on the upper leaves and developing buds.
Weeks 4 to 5 of the Cannabis Flowering Stage
By week four, vertical growth slows down significantly. Your plant now puts all its energy into developing buds. The small formations that appeared earlier start filling out and becoming more noticeable.
During this middle part of the cannabis flowering stage, you will see the buds getting bigger each day. More trichomes appear, giving the flowers a frosty appearance. The aroma also becomes more noticeable as terpene production increases.
Nutrient needs shift during these weeks. Your plants require higher amounts of phosphorus and potassium to support flower development. A typical NPK ratio during mid-bloom might be around 6-10-15. Watch for signs of nutrient burn like brown leaf tips and adjust feeding accordingly.
This is also when you should pay close attention to the structure of your buds. Healthy development shows tight, compact formations with plenty of white pistils. If buds appear loose or airy, consider whether your light intensity is sufficient or if environmental conditions need adjustment.
Weeks 6 to 8 of the Cannabis Flowering Stage
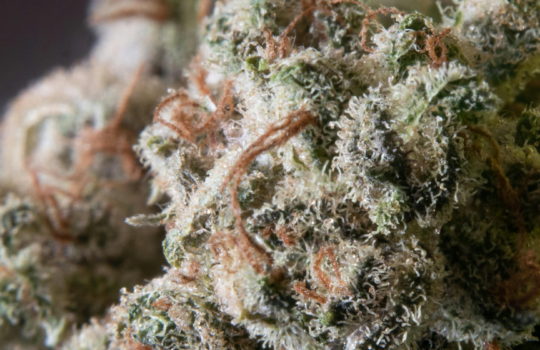
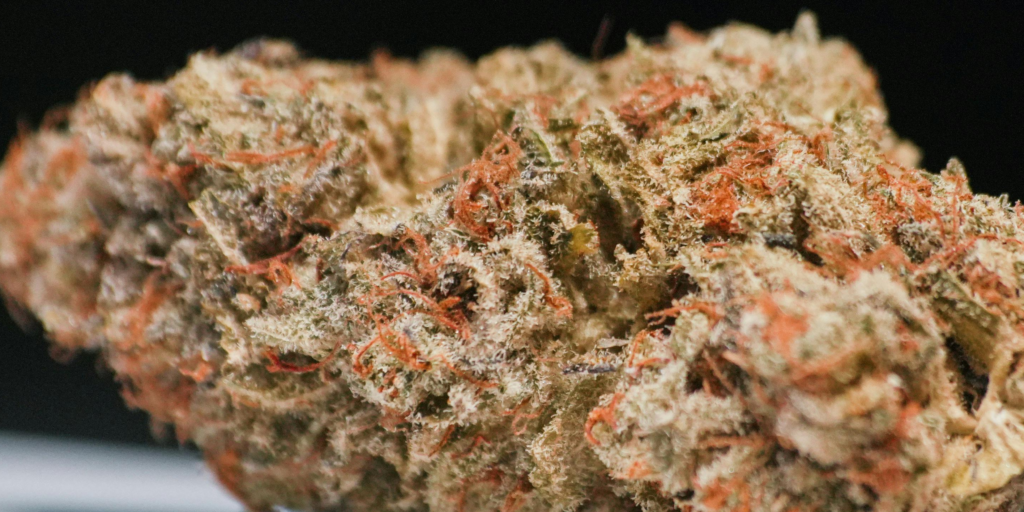
This is when the magic happens. Buds swell rapidly and become dense. The pistils start changing from white to orange or amber. Trichomes become more pronounced, and the smell can become quite strong.
During the late cannabis flowering stage, humidity control becomes very important. Keeping relative humidity between 30 to 50 percent helps prevent mold and bud rot. Good airflow around your plants is equally important for keeping moisture from building up.
Many growers begin flushing their plants with plain water during the last two weeks. This process helps remove excess nutrients from the growing medium and can improve the taste of the final product. Some growers prefer to continue feeding at reduced levels, so this remains a matter of personal preference.
The final weeks require patience. Your buds may look ready before they actually are. Resist the urge to harvest early, as the last few weeks contribute significantly to potency and overall quality.
Weeks 9 to 12 for Longer Flowering Strains
Some strains, particularly sativa-dominant varieties, need additional time to fully mature. During these extended weeks, bud development continues at a slower pace. The focus shifts from size to ripening and cannabinoid production.
Continue monitoring trichome development closely during this period. The gradual shift from clear to milky to amber indicates the progression of cannabinoid maturity. Environmental conditions remain important, so maintain proper temperature and humidity levels throughout.
Longer flowering strains often produce larger yields but require more patience and resources. Plan your grow accordingly if you choose varieties that need 10 weeks or more to finish.
Environmental Conditions During the Cannabis Flowering Stage
Temperature and humidity play big roles in the success of your cannabis flowering stage. Daytime temperatures between 70 to 80 degrees Fahrenheit work well for most strains. Nighttime temperatures can drop slightly to around 65 to 70 degrees Fahrenheit.
Keeping a temperature difference between day and night can actually benefit your plants. This differential helps stimulate terpene production and can bring out purple colors in certain strains. Avoid extreme swings or prolonged exposure to temperatures above 85 degrees Fahrenheit, as this can stress your plants and reduce potency.
Humidity should gradually decrease as you move through the cannabis flowering stage. Early flowering does well with 40 to 60 percent relative humidity. As buds develop, lower this to 40 to 50 percent. During the final weeks, aim for 30 to 40 percent to minimize the risk of mold.
Air circulation keeps your plants healthy throughout the flowering period. Fans help strengthen stems and prevent stagnant air pockets where mold could develop. Position fans to create gentle movement without directly blasting your buds. Oscillating fans work well for providing consistent airflow throughout your grow space.
Nutrients for the Cannabis Flowering Stage
Your plants have different nutritional needs during the cannabis flowering stage compared to vegetative growth. While nitrogen was important for building leaves and stems, flowering plants need more phosphorus and potassium.
Phosphorus supports energy transfer and helps buds develop properly. It plays a role in root development and overall plant vigor. Deficiency shows as dark green leaves that may develop purple stems or brown spots.
Potassium plays a role in overall plant health and helps regulate water uptake. It supports the production of proteins and starches that contribute to bud density. Signs of potassium deficiency include yellowing leaf edges and weak stems.
Calcium also becomes more important during bloom, supporting cell wall strength and preventing deficiencies. Many bloom nutrients include calcium, but you may need to supplement depending on your water source and growing medium.
Start the transition to bloom nutrients gradually. Switching too fast can shock your plants. Many experienced growers use half vegetative and half bloom nutrients for the first week of flowering before fully switching over.
Watch your plants carefully for signs of deficiency or overfeeding. Yellow leaves can indicate nitrogen deficiency, which is normal toward the end of flowering as the plant redirects resources to bud production. Brown leaf tips often mean nutrient burn from too much feeding. Adjust your nutrient solution based on what your plants tell you.
Some growers add PK boosters during mid to late flowering to support bud development. These supplements provide extra phosphorus and potassium during peak flower production. Use them sparingly and follow manufacturer recommendations to avoid overfeeding.
Common Problems During the Cannabis Flowering Stage
Bud rot is one of the most serious issues growers face during the cannabis flowering stage. This fungal infection, caused by Botrytis cinerea, thrives in high humidity and poor air circulation. Infected buds turn brown and mushy inside, often spreading quickly to nearby flowers.
Prevention is the best approach for bud rot. Keep humidity levels appropriate, ensure good airflow, and inspect your buds regularly. Dense colas are particularly susceptible, so pay extra attention to your largest buds. If you spot bud rot, remove the affected areas immediately and improve ventilation. Cut at least an inch below any visible infection to ensure complete removal.
Nutrient lockout can occur when pH levels fall outside the optimal range. For soil grows, aim for a pH between 6.0 and 6.8. Hydroponic systems work best with pH between 5.5 and 6.5. Test your water and nutrient solution regularly to catch problems early. Lockout prevents your plants from absorbing nutrients even when they are present in the growing medium.
Pests can also cause damage during flowering. Spider mites, thrips, and aphids are common culprits. Regular inspection helps you catch infestations before they spread. Check the undersides of leaves where pests often hide. Avoid using harsh chemical treatments on flowering plants, as residues can end up in your buds. Organic options like neem oil work better for flowering plants, though even these should be avoided close to harvest.
Light leaks during the dark period can disrupt the cannabis flowering stage. Even small amounts of light can cause stress and potentially trigger hermaphroditism in photoperiod strains. Hermaphrodite plants produce both male and female flowers, leading to self-pollination and seeded buds. Seal any gaps in your grow space and avoid opening doors during the dark period.
Heat stress causes several problems during flowering. Buds may become loose and airy, terpenes can evaporate reducing aroma and flavor, and overall potency may decrease. If your grow space gets too hot, consider adding air conditioning, increasing ventilation, or switching to LED lights that produce less heat.
Recognizing When to Harvest After the Cannabis Flowering Stage
Knowing when your cannabis flowering stage is complete requires close observation. The pistils on your buds provide one indicator. When about 70 to 90 percent of the pistils have darkened and curled in, harvest time is approaching.
Trichomes offer a more accurate picture of readiness. These tiny, mushroom-shaped glands cover your buds and produce cannabinoids and terpenes. Use a magnifying glass or jeweler’s loupe to examine them closely. A digital microscope provides even better visibility for examining trichome color.
Clear trichomes indicate more time is needed. The cannabinoids have not fully developed at this stage, and harvesting now results in less potent buds with a more energetic but shorter lasting effect.
Milky white trichomes suggest peak THC production. This is when most growers choose to harvest for maximum potency. The effects tend to be more cerebral and uplifting when harvested at this stage.
Amber trichomes indicate some THC has begun converting to CBN. This cannabinoid produces more sedative and relaxing effects. Buds harvested with more amber trichomes typically provide a heavier body sensation.
Most growers harvest when trichomes are mostly milky with a few amber ones appearing, typically around 10 to 20 percent amber. The exact ratio depends on your preference and the effects you want to achieve.
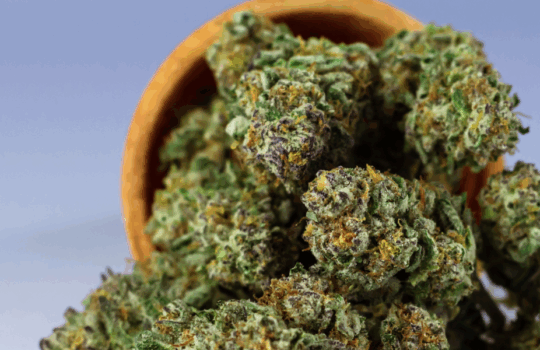
Other signs of maturity include swollen calyxes, reduced water uptake, and yellowing fan leaves. Some strains also develop enhanced colors like purple or blue as they approach harvest. These visual cues combined with trichome examination help you choose the perfect harvest window.
Tips for Success During the Cannabis Flowering Stage
Support your plants as buds get heavy. Stakes, trellises, or plant ties prevent branches from breaking under the weight of dense flowers. Install supports early so you do not disturb the plants later. A screen of green setup provides excellent support while also helping train plants for an even canopy.
Maintain a consistent environment throughout the cannabis flowering stage. Big swings in temperature, humidity, or light can stress your plants and affect bud quality. Invest in quality thermometers and hygrometers to monitor conditions. Digital devices with memory functions help you track highs and lows even when you are not present.
Keep your grow space clean. Dead leaves and plant debris can harbor pests and diseases. Remove fallen leaves promptly and maintain good hygiene practices. Sanitize your tools before working with plants to prevent spreading any potential infections.
Consider the genetics of your strain. Different varieties have different needs and flowering times. Research your specific strain to understand its preferences and timeline. Seed banks and breeders often provide detailed growing information for their varieties.
Document your grow with notes and photos. Tracking what works and what does not helps you improve with each cycle. Note feeding schedules, environmental conditions, and any problems you encounter. This information becomes valuable for future grows.
Be patient. The temptation to harvest early is strong, but waiting for the right moment pays off with better potency and more developed flavors. Those final weeks make a significant difference in the quality of your harvest.
Drying and Curing After the Cannabis Flowering Stage
Once you harvest, proper drying and curing preserve the quality you worked hard to achieve during the cannabis flowering stage. Cut your plants and hang them in a dark room with good airflow. Maintain temperatures around 60 to 70 degrees Fahrenheit and humidity between 55 to 65 percent.
Drying typically takes 7 to 14 days depending on environmental conditions and bud density. The buds are ready for the next step when small stems snap instead of bending. The outside of the buds should feel dry to the touch while the inside retains some moisture.
Curing involves placing dried buds in airtight containers, usually glass jars. Open the jars daily for the first week to release moisture and allow fresh air exchange. This process, called burping, prevents mold growth and helps develop flavors.
A proper cure takes at least two weeks but many growers prefer four to eight weeks for optimal results. Well-cured buds have smoother smoke, better flavor, and improved potency compared to buds that were only dried.
At Express Weed Store, we offer a wide selection of high-quality cannabis products, carefully chosen for superior excellence. Explore our curated strains and exclusive options, all locally procured and delivered promptly and discreetly for your convenience.
Experience swift and reliable cannabis delivery across Canada. Vehicle delivery available for $9 and mail order for $20. Contact us at 1 888 377 9838 for assistance with your order.
FAQs About the Cannabis Flowering Stage
How long does the cannabis flowering stage last
The cannabis flowering stage typically lasts between 7 to 12 weeks. Indica strains usually finish faster, around 7 to 9 weeks, while sativa strains may take 10 to 12 weeks or longer. Autoflowering varieties generally complete flowering in about 6 to 8 weeks from the start of bloom. Environmental factors and growing conditions can also influence the exact timeline.
Can I switch back to vegetative growth after the cannabis flowering stage starts
Photoperiod plants can be reverted to vegetative growth by increasing light hours to 18 or more per day. However, this causes significant stress and takes several weeks for the plant to fully transition back. The process, called revegetation, produces unusual growth patterns initially. Most growers do not recommend this practice as it can reduce overall yield and quality. It is better to plan your grow properly from the start.
Why are my buds not getting bigger during the cannabis flowering stage
Several factors can cause slow bud development. Insufficient light intensity is a common cause, as flowering plants need strong light to produce dense buds. Incorrect nutrient levels, particularly low phosphorus or potassium, limit flower growth. Improper temperature or humidity creates stress that diverts energy from bud production. Genetic limitations also play a role, as some strains naturally produce smaller buds. Make sure your environment is optimized and you are providing adequate nutrients for the flowering phase.
Should I remove fan leaves during the cannabis flowering stage
Light defoliation can improve airflow and light penetration to lower bud sites. Remove leaves that block bud sites or create dense areas where moisture could collect. Avoid removing too many leaves at once, as they still provide energy to the plant through photosynthesis. Most growers limit defoliation to the early and mid flowering phases and avoid removing leaves during the final weeks when the plant needs all available energy for bud development.
What causes foxtailing during the cannabis flowering stage
Foxtailing, where buds grow new calyxes in tower-like formations, can result from heat stress, light stress, or genetics. Some strains naturally foxtail without any negative effects on quality. When caused by environmental stress, the new growth tends to be airy and less potent. If foxtailing appears due to heat or light issues, adjust temperatures or increase the distance between lights and plants. Genetic foxtailing does not require any correction and is simply a characteristic of that particular variety.
How do I increase bud density during the cannabis flowering stage
Dense buds result from proper lighting, appropriate nutrients, and good environmental control. Ensure your plants receive adequate light intensity throughout flowering. Provide sufficient phosphorus and potassium to support flower development. Maintain temperatures on the cooler side of the acceptable range, as heat can cause airy buds. Good airflow strengthens stems and allows buds to develop properly. Some growers also use silica supplements to improve cell wall strength and overall bud structure.